Setting Up a Session
STEP 1: Select the Surround Format
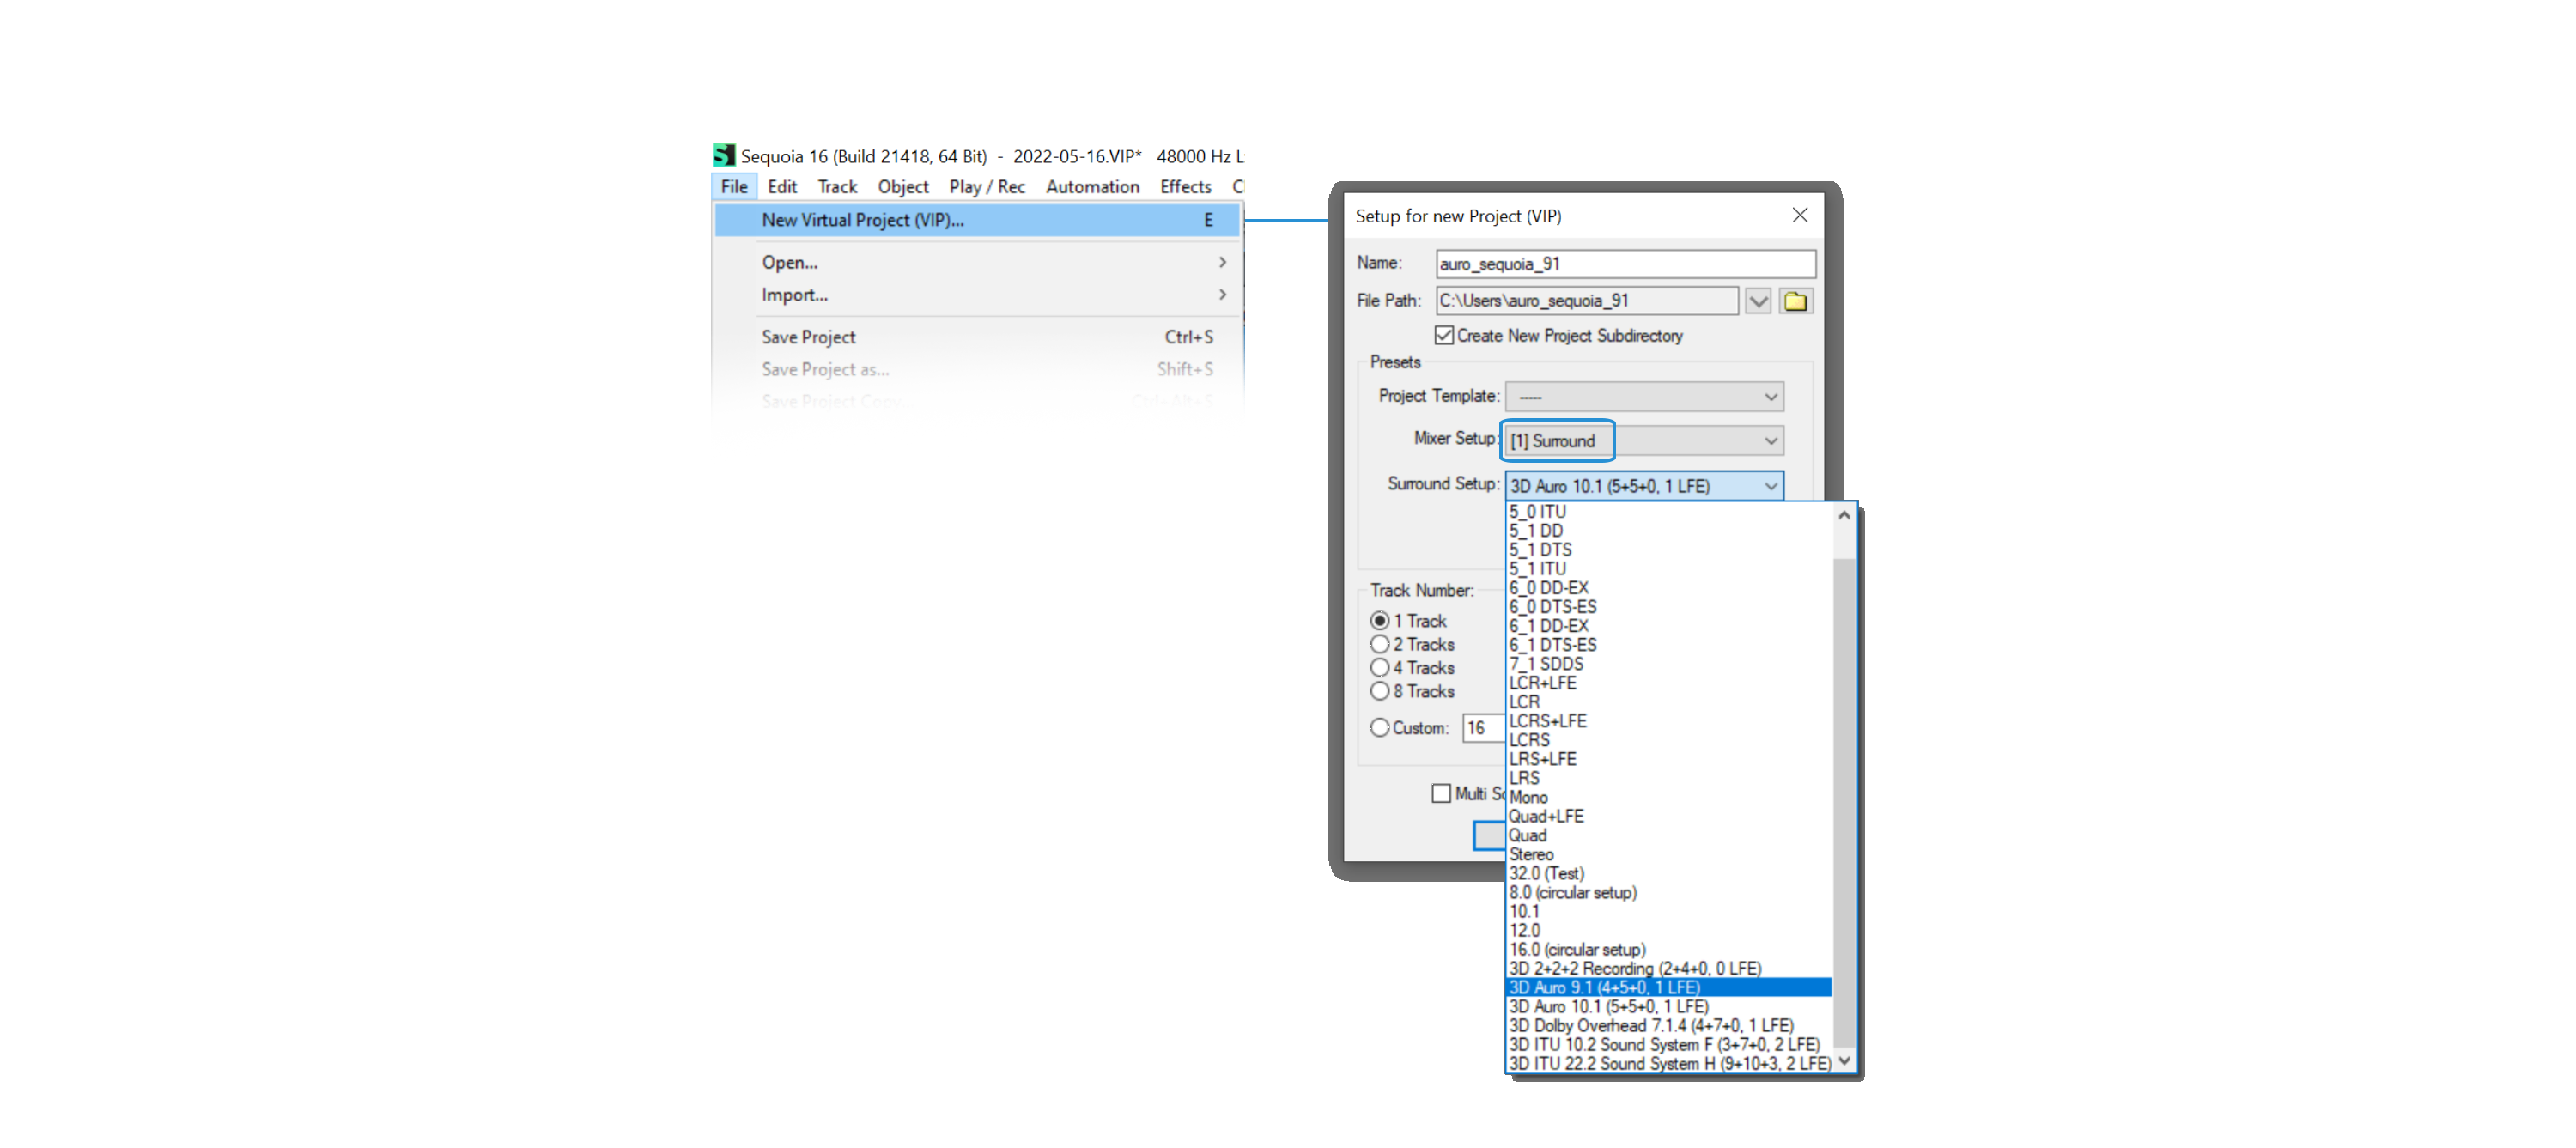
Figure 5 – 32 | Select the Surround Format in Sequoia
Go to File Menu / New Virtual Project (VIP)
Create a new Virtual Project, select the Mixer Setup option “[1] Surround” and select the desired format in the Surround Setup drop down menu.
The AURO-3D Export plugin supports the following formats:
• Auro 9.1: Support for Auro 9.1 and Auro Encoded 5.1 input formats.
• 5.1 ITU: Support for Surround 5.1 and Auro Encoded 5.1 input formats.
• 5.0 ITU: Support for Surround 5.0 and Auro Encoded 5.0 input formats.
STEP 2: Configure the I/O
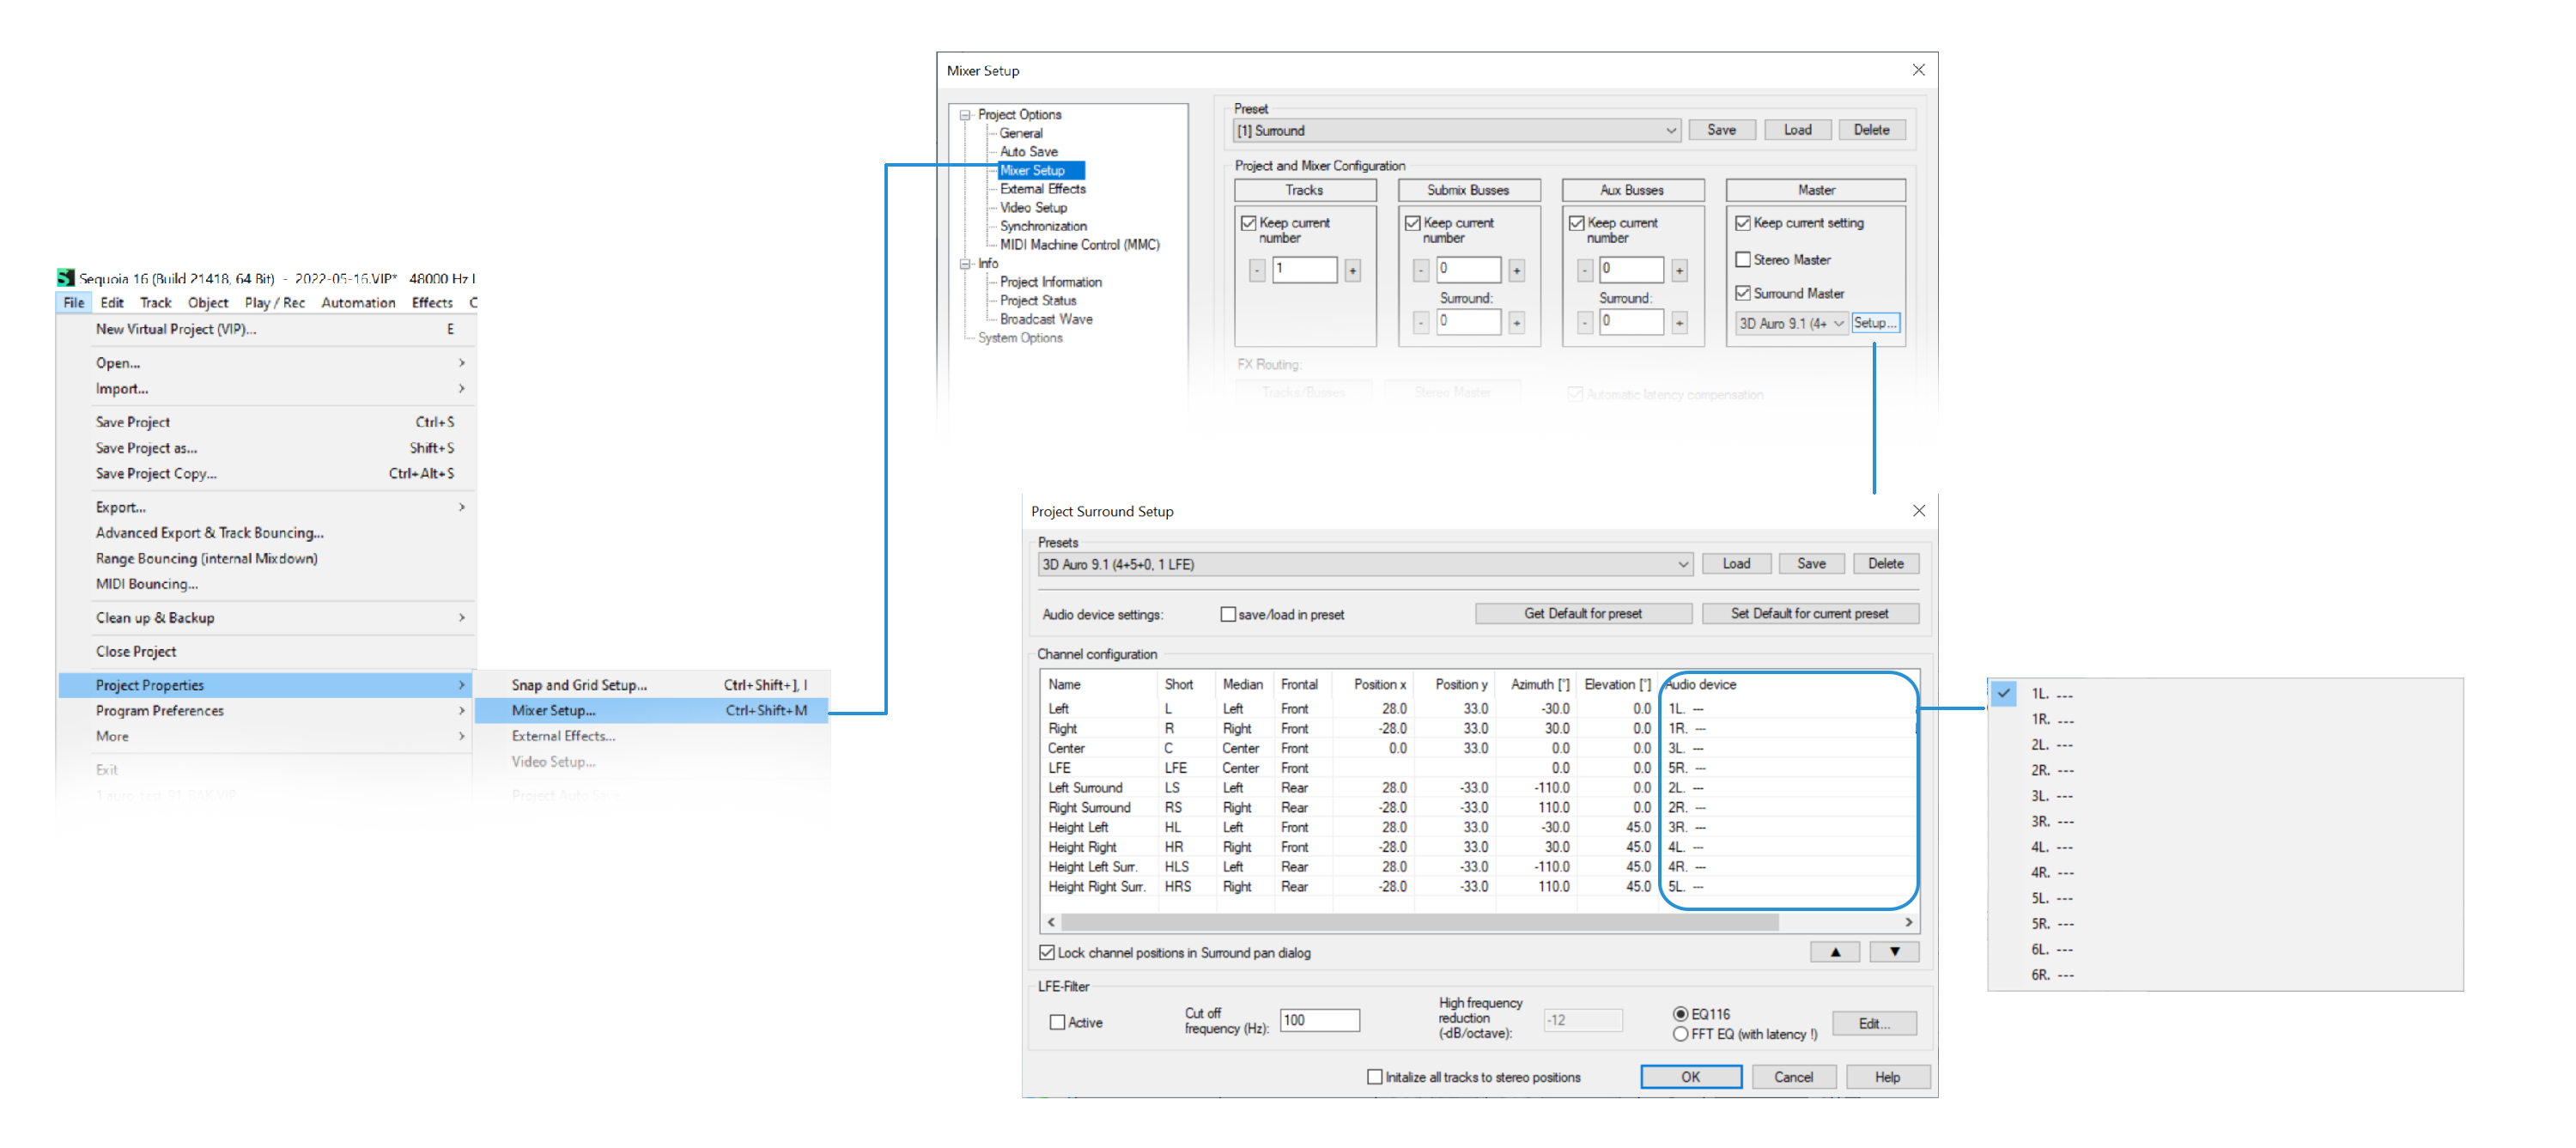
Figure 5 – 33 | Mapping each audio channel to the corresponding hardware output in Sequoia
Go to File Menu / Mixer Setup / Master Setup Button / Audio Device Column
Connect each audio channel to the corresponding hardware output.
Mixing in 3D
STEP 1: Insert the AURO-3D Export Plugin on the Master Track
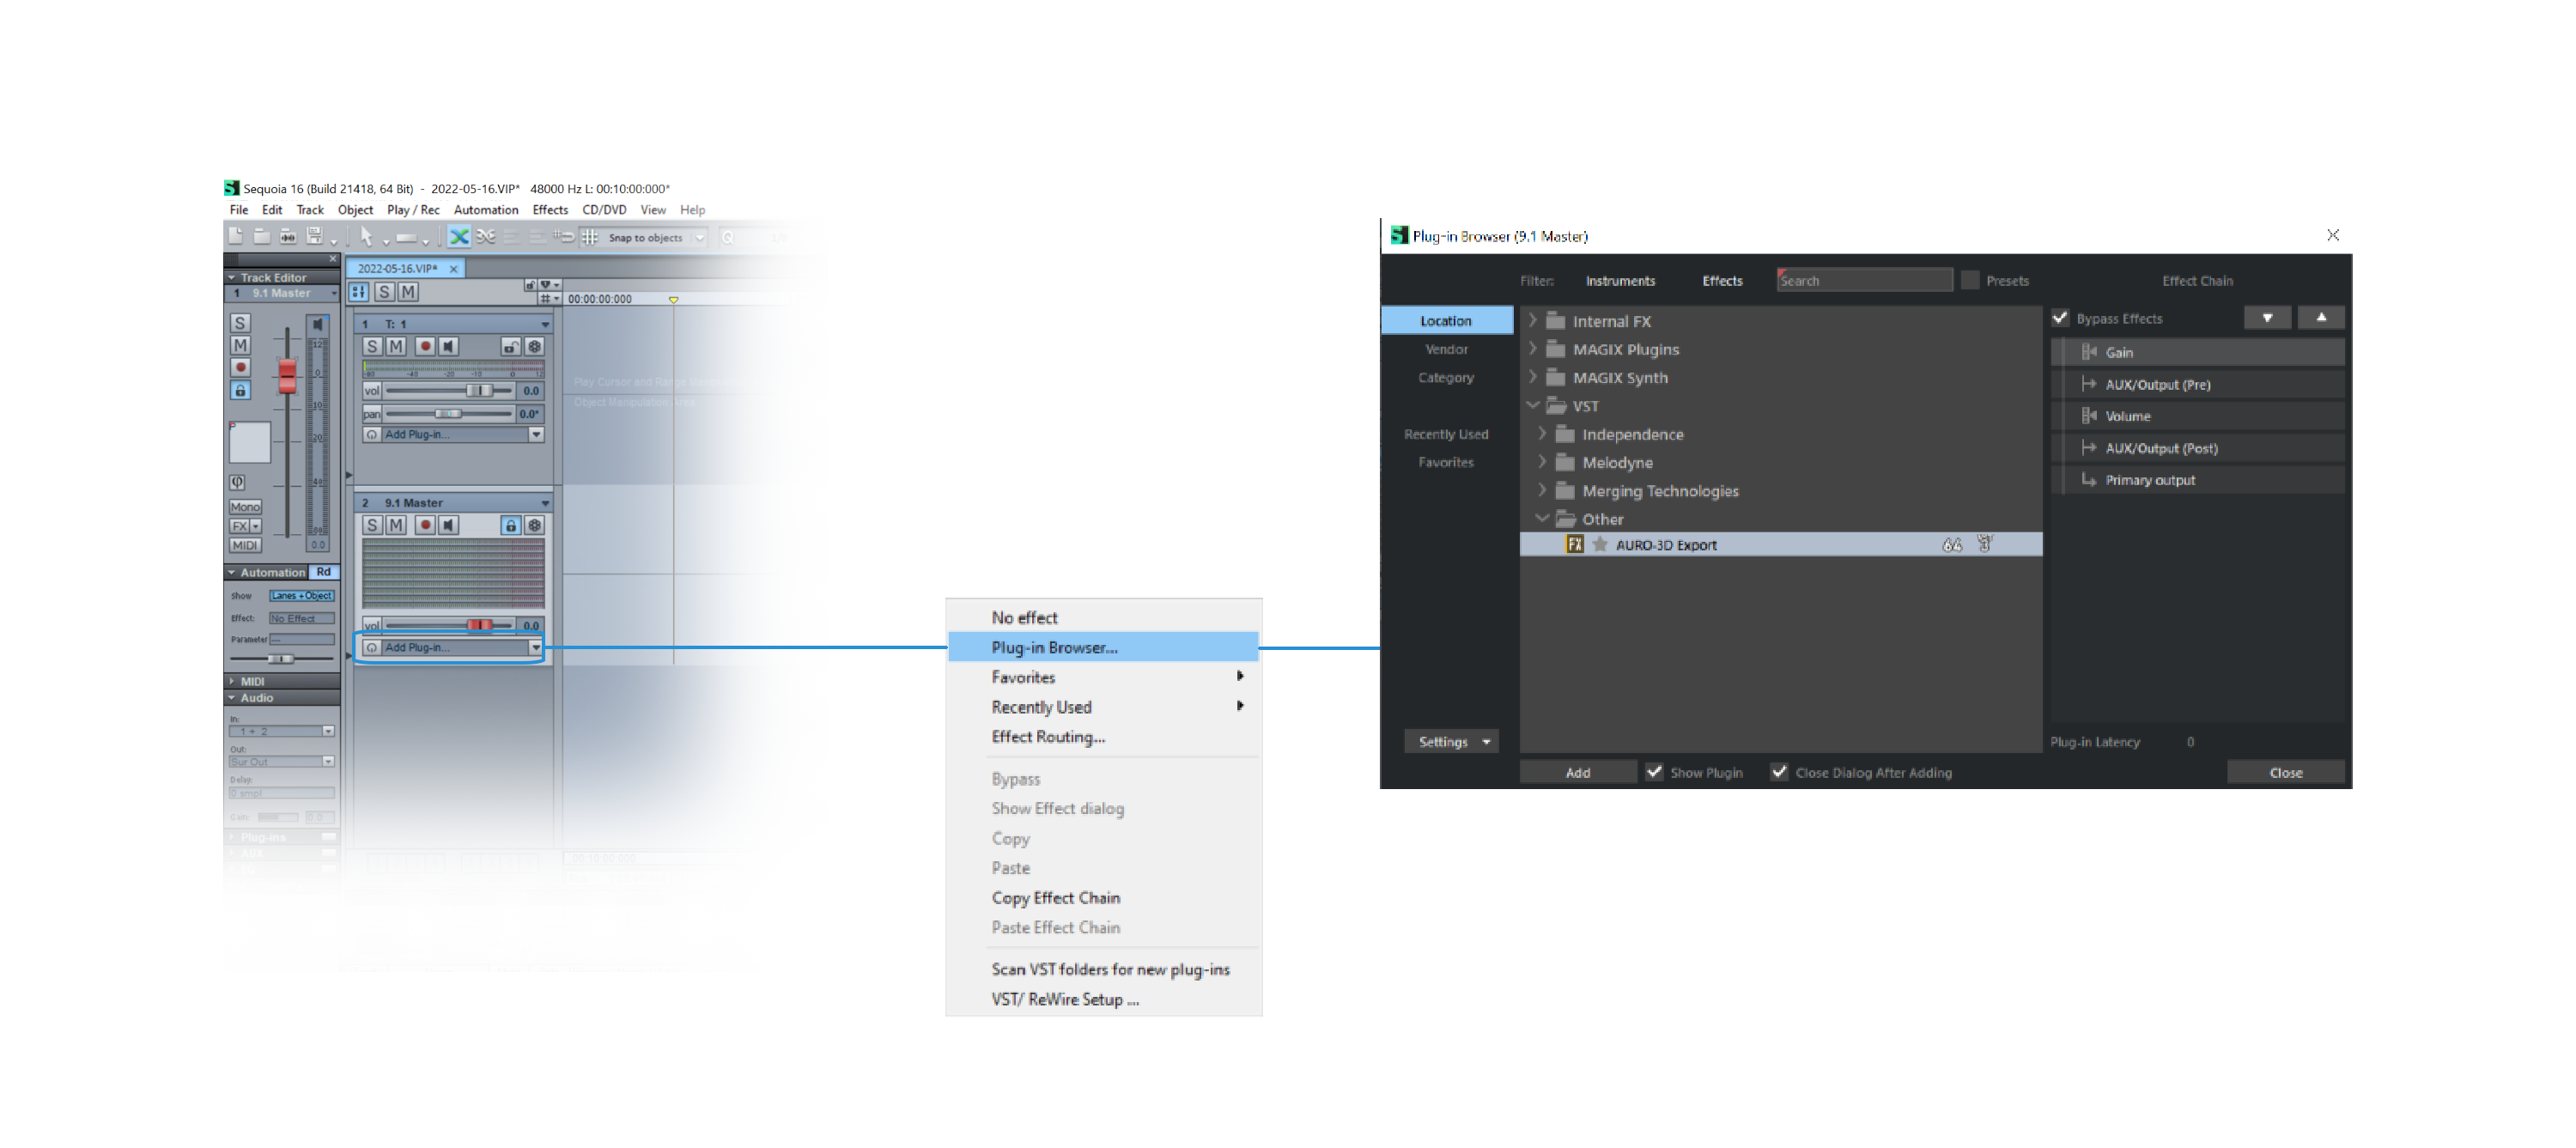
Figure 5 – 34 | Inserting the AURO-3D Export Plugin onto the Master Track in Sequoia
The AURO-3D Export Plugin treats all audio channels at the very end of the audio chain.
STEP 2: Start Panning Audio Sources
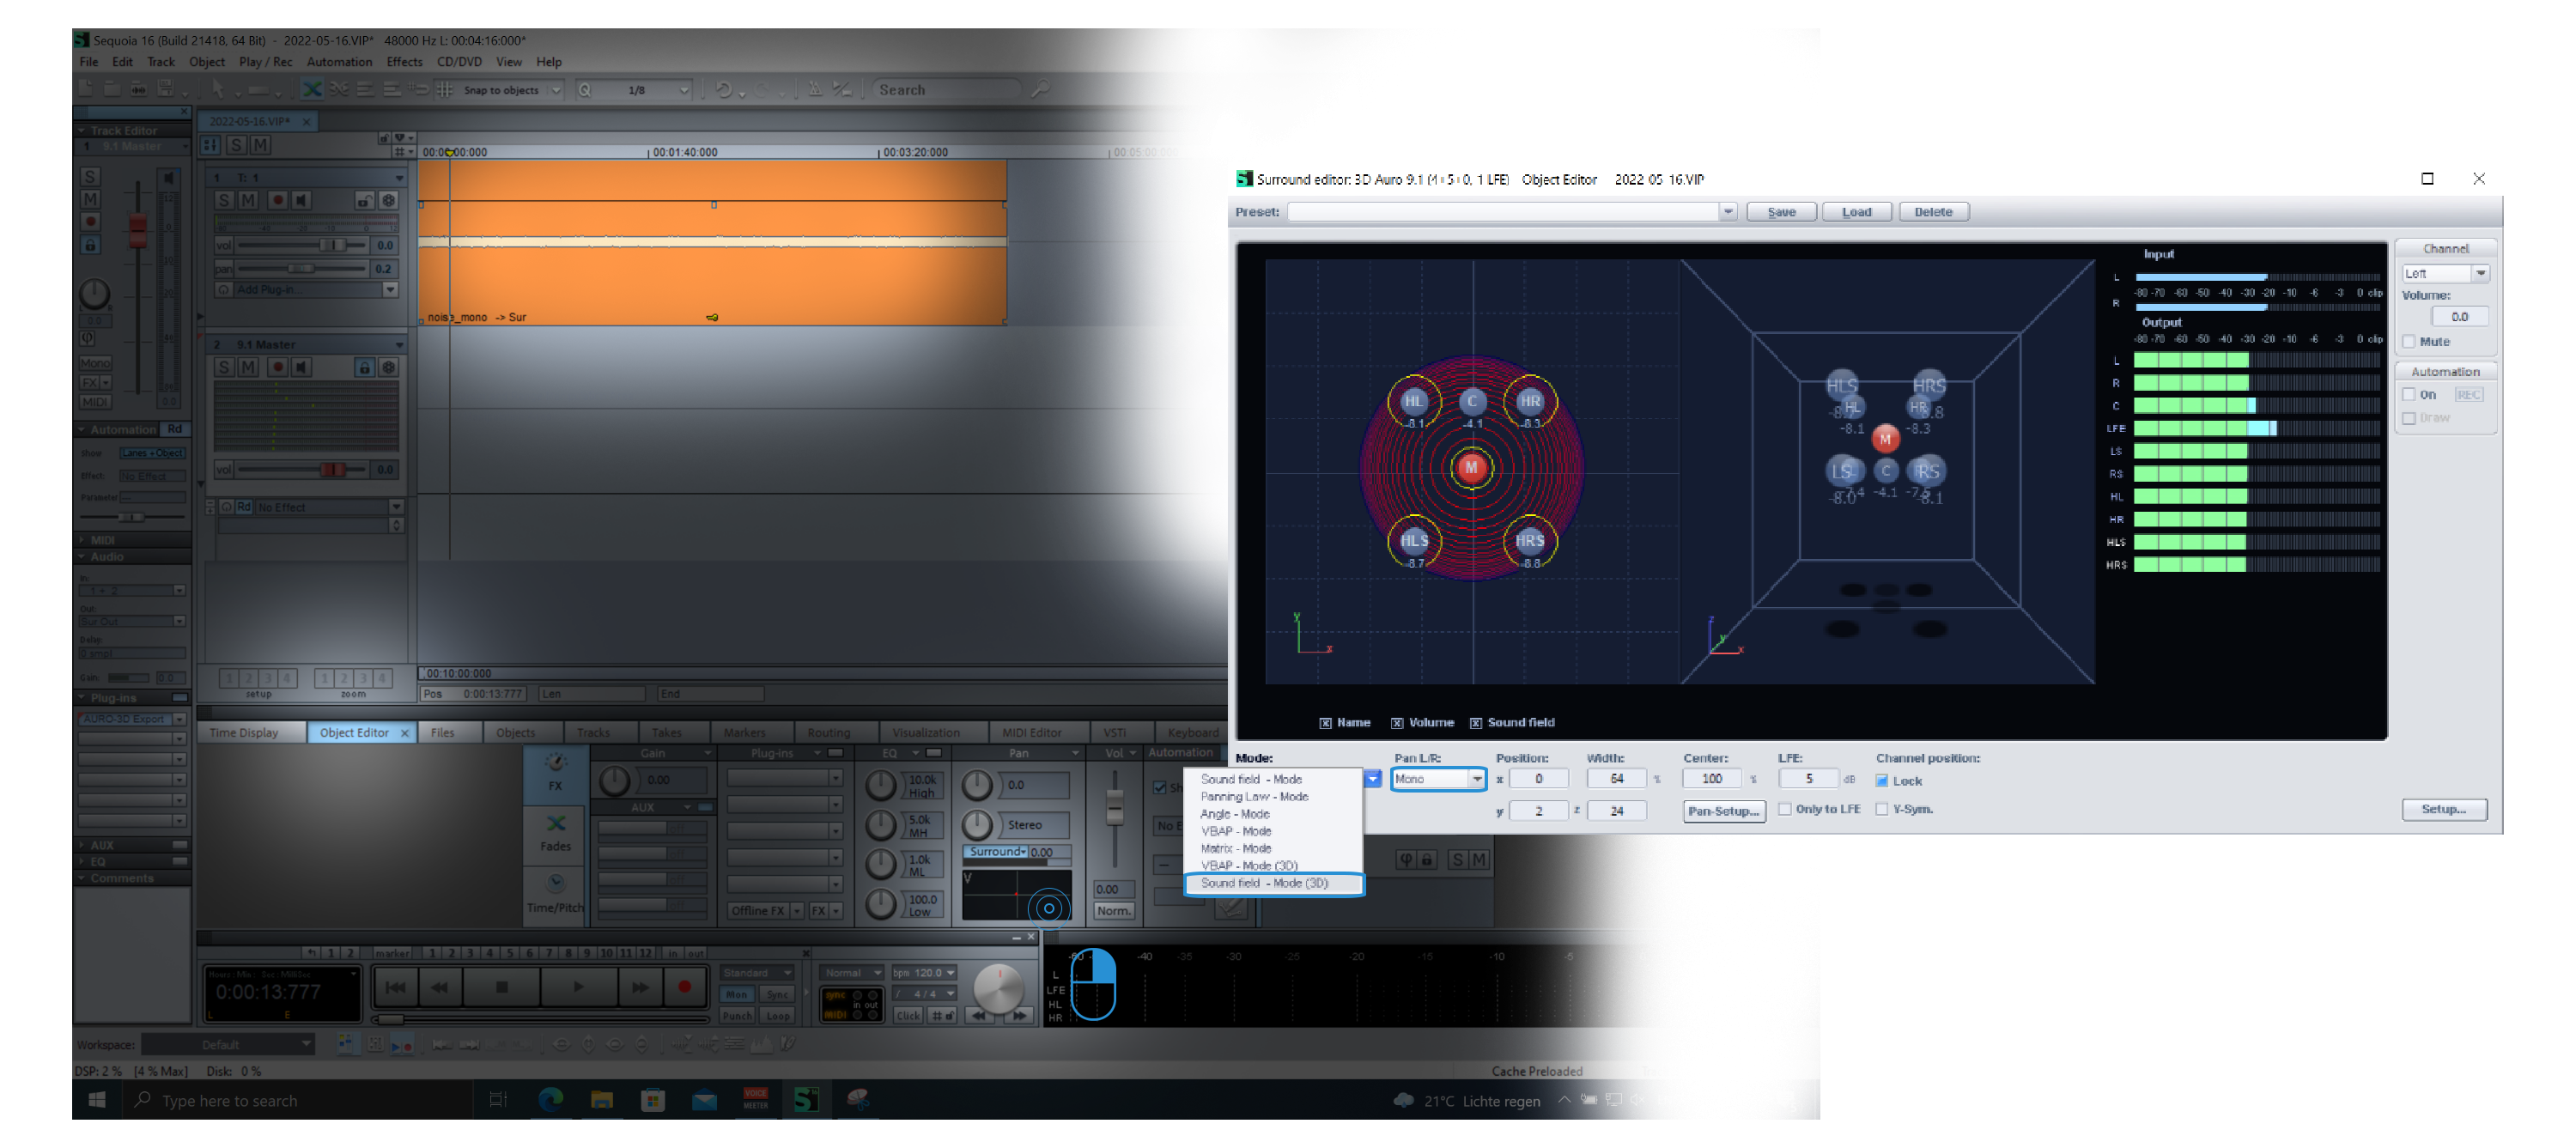
Figure 5 – 35 | Panning Audio Sources in Sequoia
Simply use the panners natively provided by the DAW to pan the audio sources in 3D.
Make sure that the track format and output module of the audio track are properly configured.
Note that it is perfectly possible to pan a mono, stereo or surround source.
STEP 3: Listen to the Different Versions of the Mix
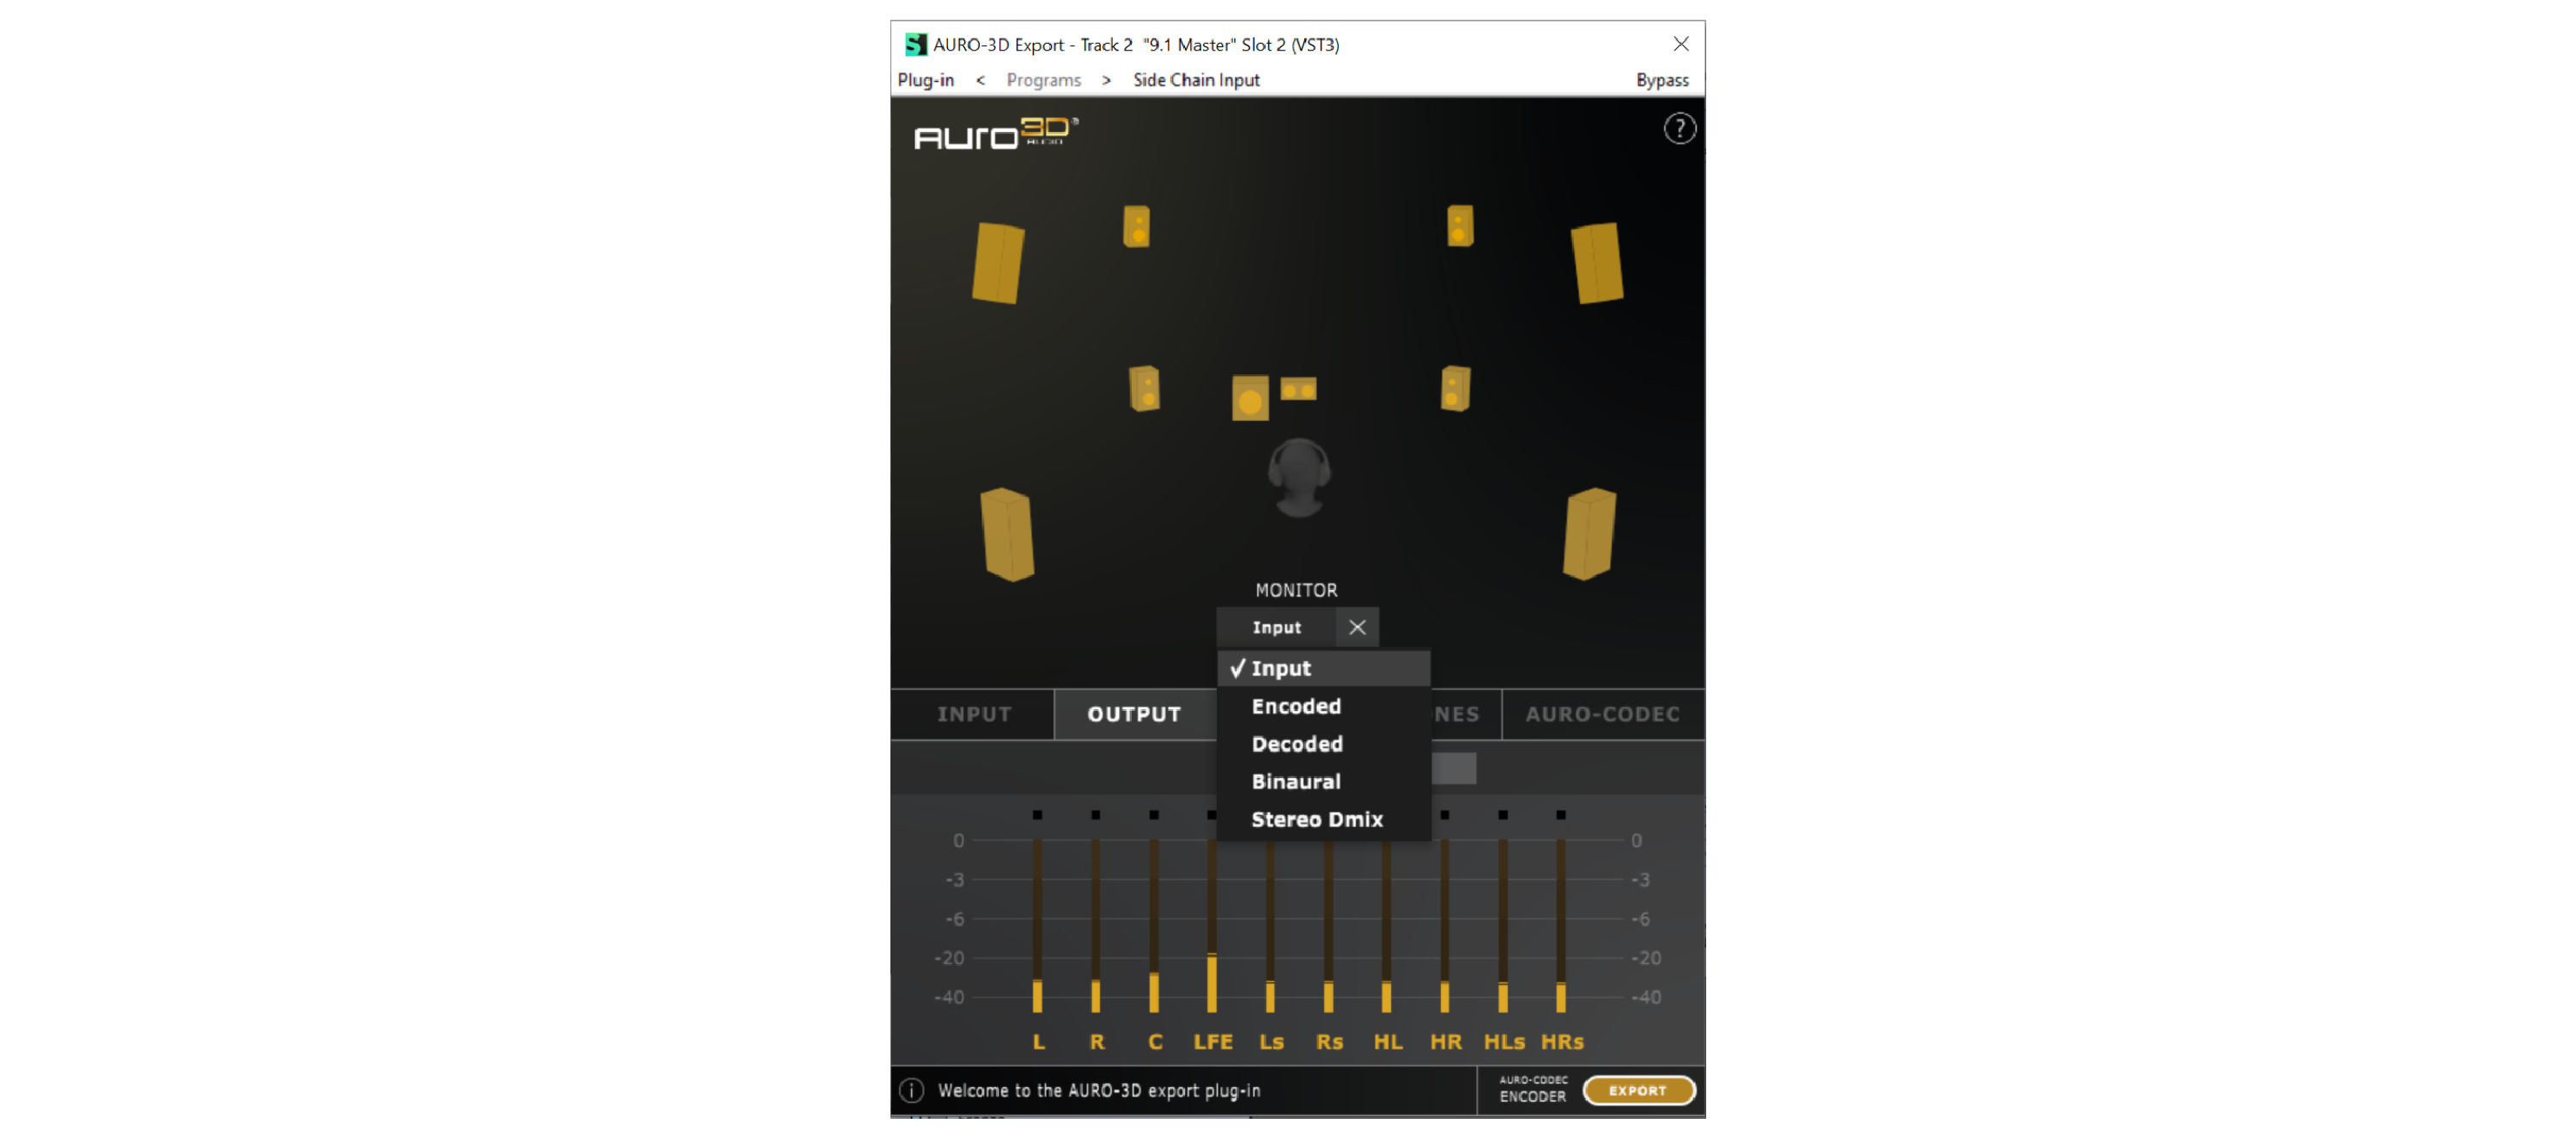
Figure 5 – 36 | Monitor Drop Down Menu of the AURO-3D Export plugin in Sequoia
While mixing, the AURO-3D Export plugin lets you:
• Listen to a Binaural Version of your mix using Auro-Headphones technology. (Free)
• Listen to a Stereo Downmix version of your mix. (Free)
• Listen to an Auro-Codec encoded version of your mix using the Auro-Codec Encoder. (Auro-Codec Encoding License Required)
• Decode Auro-Codec Encoded content using the Auro-Codec Decoder. In that case, the AURO-3D Export plugin should not be inserted on the master track but directly on the audio track containing the Auro-Codec encoded content instead. (Auro-Codec Encoding License Required)
![]() It is recommended to decode Auro-Codec Encoded contents in relevant track formats. Examples:
It is recommended to decode Auro-Codec Encoded contents in relevant track formats. Examples:
• 7.1 interleaved file that carries Auro 11.1 (7.1+4H) Encoded content should ideally be decoded in an Auro 11.1 (7+4) track format.
• 7.1 interleaved file that carries Auro 13.1 Encoded content should ideally be decoded in a Auro 13.1 track format.
• 5.1 interleaved file that carries Auro 9.1 Encoded content should ideally be decoded in a Auro 9.1 track format.
• 5.1 interleaved file that carries Auro 11.1 Encoded content should ideally be decoded in a Auro 11.1track format.
STEP 4: Export Your Mix
In order to export your mix, you can:
• Use the bounce options natively provided by the DAW to export your Immersive Mix, Binaural Mix or Stereo Downmix. (Free)
• Configure the Auro-Codec Encoder and export your encoded mix using the Auro-Codec Encoder Export Button. (Auro-Codec Encoding License Required)